Making rock candy is easy, fun, and a great science experiment, plus it is edible! It takes 5 days, and our students at CEFA Early Learning schools absolutely love checking on their candies every day to see how many crystals formed overnight! I definitely recommend that you try it at home – it is easy and so exciting!
Best Ages for This Activity
Two to five
How to Make It
Ingredients
- 1 cup water per colour you want to make
- 3 cups white granulated sugar per colour you want to make
- Food colouring
- Candy flavouring
You Will Also Need
- A stove your child can access (with supervision at all times)
- A plate
- A pot
- A wooden spoon or spatula
- Lollipop sticks (you can also use bamboo skewers if you already have some)
- Wide glasses or mason jars (400 to 800ml) – 1 per colour you want to make
- Clothespins – 1 per jar
Let’s Get Started!
- Invite your child to make rock candy
- Explain that the process will take 5 days and that they will see the sugar crystallize over those five days, to form their candy
- Your child can decide which colours and flavours to make. You can make just one rock candy if you like or make several, with different colours and flavours.
- Invite your child to assemble the materials you will need. Once they are all together, you can follow these steps:
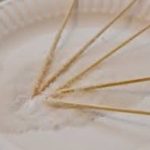
- Put sugar on a plate
- Dip the sticks in water for 20 minutes (one stick per candy) then roll them in sugar. Set aside so they can dry. These are the seed crystals that the rest of the crystals will grow on.
- In a large pot, add the water and set it to medium heat until it simmers
- Add in the sugar, one cup at a time, stirring it to dissolve it
- Bring to a boil, then remove from heat and allow it to cool for 20 minutes
- After 20 minutes, run the tap water until it gets really hot, let the water run over the mason jars so they are hot when you pour the mixture in them
- Pour the sugar solution in each mason jar. You can only make one rock candy per mason jar because it cannot touch the bottom or the sides of the jar.
- Add the colour you want in each jar
- Add the flavour
- Once it is well mixed, add one stick to each jar, holding it with a clothespin so it does not touch the bottom or the sides of the jar:
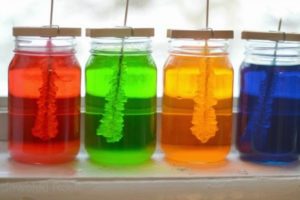
- Leave about 4cm (1.5 inches) at the bottom so the stick can grow the crystals around it. If it is too close to the bottom, the crystals might fill up around it.
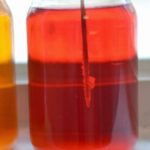
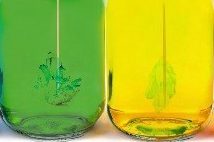
- The crystals will begin forming. Invite your child to draw their observations over the course of 5 to 10 days. They can also take the rock candy out and observe it as they go. It is beautiful to look at and fascinating for children to see the whole process!
Day 1:
Day 3
Day 5
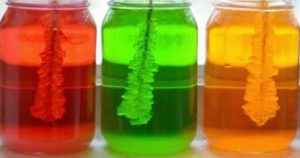
- The more days you leave the rock candy, the bigger it will become. You can take it out after 5 days or wait 2 weeks and see how big it gets, or try one of each (take one and save one) to compare! Invite your child to measure them every day for added math learning!
- Once your rock candy is ready, gently take it out of the solution and transfer it to a clean cup so it can dry. Let it dry for 4 hours. If you can’t wait to eat it, that’s ok too!
- Rock candy, if stored in a dry place, will last one year.
Learning Opportunities
I love helping children learn to cook because it is a great life skill and an incredible way to contribute, to do something for someone other than yourself, which children both love doing and need to do. By cooking with you, children feel great pride, and benefit from a healthy self-esteem. They also learn to be independent and responsible. Children will learn S.T.E.M. while measuring, combining, mixing and counting. This recipe also has a great amount of hand-eye coordination skills, and fine motor skills, a precursor to writing. Following directions also teaches reading and S.T.E.M..
Doing this activity together also is a great opportunity for you and your child to connect. You can share life stories, ask them about them, their plans, and get closer. You can ask, for example:
- Who are you preparing rock candies for?
- How many rock candies will we need then?
- What is your favourite flavour for the rock candies?
- What is your favourite colour for the rock candies?
- What do you think your friends’ favourite colours are?
- What do you think your family’s favourite colours are?
- What other colours or flavours do you want to try next time?
- What other candies have you tasted before?
- Which ones are your favourites?
- Do you think we can learn to make those?
Making the candy and cleaning the workspace and the dishes are essential life skills. Cooking in itself is also an important life skill. Sharing what they cooked with the rest of the family or with friends teaches your child the habit of contribution and thinking of others.
Extended Learning Opportunities
There are two different things that will happen to your science experiment, which will make the crystals grow:
Precipitation
You created a supersaturated solution of sugar and water (a solution in which no more sugar can dissolve at a particular temperature). A supersaturated solution is unstable—it contains more solute (in this case, sugar) than can stay in a liquid form—so the sugar will come out of the solution, (as crystals) forming what’s called a precipitate.
Evaporation
Over time, the water will evaporate slowly from the solution. As the water evaporates, the solution becomes even more saturated and sugar molecules will again come out of the solution and collect on the seed crystals (the original tiny crystals you made on the bamboo stick).
The rock candy crystals grow molecule by molecule. Your finished rock candy will be made up of about a quadrillion (1,000,000,000,000,000) molecules attached to the stick!
CEFA tip: Remember to let your child do as much of the process as they are capable of.
Books Your Child Might Like
For 3+
Toys Your Child Might Like
For 3+